
From the Video menu, you can view all of the cameras that are on your system. Select a camera to view live video.
Edit a Camera
To edit a camera, select the Expand arrow icon in the upper right corner of the camera’s tile and select Edit.
-
Edit Camera Name: To change the camera name, select the Edit icon next to the current name. Enter a new name, then select the Done icon.
-
Record on Motion: To set a camera to record when motion is detected, select Record on Motion and then choose Always, Never, or When Armed.
-
Record on Alarm: To set a camera to record when the system goes into alarm, switch on the option in the camera settings. When enabled, the camera will attempt to provide recorded footage beginning five seconds before an alarm and end fifteen seconds after the alarm. Two additional twenty-second clips will be available for a total of one minute of footage.
-
Flip Image: Turn this option on in camera settings to change the perspective of ceiling-mounted cameras and keep the correct perspective.
-
Motion Detection Regions: Place, adjust, and delete up to four regions of motion detection per camera. The camera will record footage from five seconds before until fifteen seconds after motion is detected in one of the regions of motion detection.
Camera Settings
Configure advanced settings in Virtual Keypad for compatible cameras.
Set Point
On pan and tilt cameras, you can configure up to three set points. Once configured, you can quickly move the camera’s field of view to different areas. Adjust the camera’s view with the bars on the side and bottom of the viewer window. When the camera is positioned, press and hold the Set Point icon below the viewer window to create the set point. When you select the Set Point button, the camera will relocate to that exact set point.
Record Video Clips with SecureCom or Digital Watchdog Cameras
Select the red Record button to manually record a video clip.
View Recorded Video Clips
Select Clips to view a list of previously recorded video clips. Clips are ordered by date and time.
-
Name Recorded Clips: Select the video clip’s name to rename the clip.
-
Protect Clips: When viewing a clip, select the Lock icon to save the video from being overwritten.
-
Download Clips: Select the Download icon to download a clip.
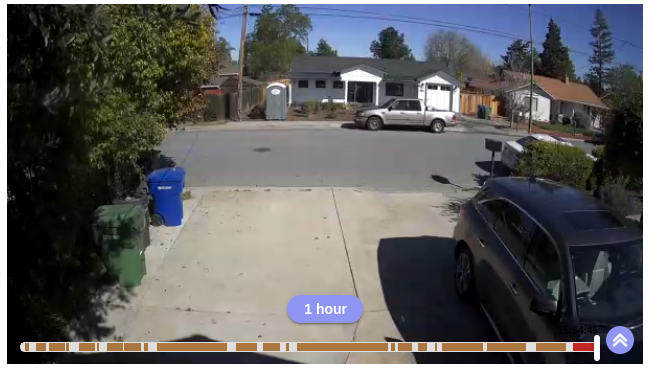
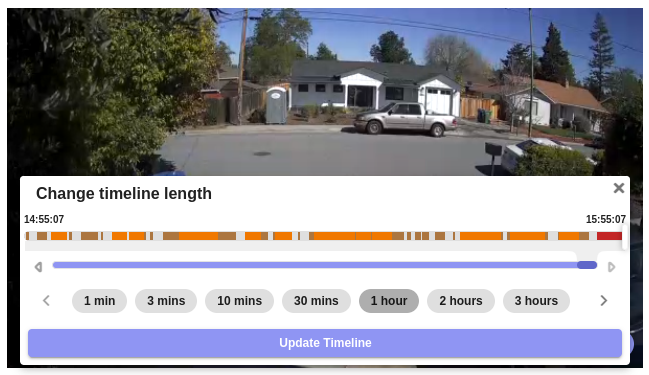
View Recorded Clips on a Timeline
Video timeline lets you quickly scroll through recorded videos. You can adjust the timeline length to display recordings over different time periods from 1 minute to three days.
Detection region and line cross events are bookmarked on the timeline, allowing you to skip to those specific sections.
The timeline uses color coding to indicate different video statuses:
-
Red – No footage available
-
Grey – Default timeline for footage
-
Orange – Verified analytic detection regions or lines
-
Tan – Verified alarm zone detection regions or lines
To view the video timeline, complete the following steps:
-
Go to Video.
-
Select the camera you want to view the clips from.
-
Select the x Timeline icon.
-
Scrub through the timeline to view recorded videos.
Connect to a Third-Party Service
If you subscribe to a compatible third-party video service like DW Spectrum, you can use these services in Virtual Keypad. Ask your alarm company about enabling compatible integrations.
-
In the menu, select Video.
-
Select Options, then select the connect option for the appropriate third-party service
-
Enter your credentials for the service, then select Connect Account.
Once your third-party service’s account is connected in Virtual Keypad, you can connect to and manage cameras.